OS Mission
| Requirements | |
|---|---|
| Base Level: | 110 |
| Starting Point: | Instance Manager in any town
|
| Rewards | |
| Experience: | - |
| Cooldown | |
| Cooldown: | Resets at 00:01 Servertime |
Walkthrough
The objective is to clear waves of mobs to progress in the instance. The waves get progressively stronger, starting at CP 1 and ending in CP 6. At the end of the instance, you will have to fight Miguel who will be assigned a random CP, and has access to the following skills:
- Heal - When idle. Targets self. Heals for 9,999
- High Heal - When idle. Targets self. Long cast time.
- Bomb - When attacking and chasing.
- Earthquake - When attacking (CP5 4k per hit, CP7 about 10k damage per hit, CP20 about 40k damage per hit, CP22 43k per hit)
- Magnum Break - When attacking
- Ignition Break - When attacking
Miguel will also spawn fireballs around him that damage players that get too close to it. As the fight progresses, he will summon more fireballs around him.
Note: Despite the map showing a large area, the instance is actually confined to a small area of the map.


Enemies
| Image | Name | Level | HP | Size/Race/Element |
|---|---|---|---|---|

|
Incomplete Caput | 110 | 31,000 | Medium/Demi-Human/Dark 2 |

|
Incomplete Dolor | 111 | 31,000 | /Demi-Human/Poison 3 |

|
Incomplete Bellare | 112 | 38,000 | /Demi-Human/Neutral 2 |

|
Miguel | 115 | 8,600,000 | /Demi-Human/Wind 4 |
Equipment
| Image | Name | Effect | How to obtain |
|---|---|---|---|
|
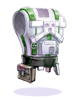
Illusion Armor A-type [1] | ATK + 100. ATK + 10 per 2 refine rate. If refine rate is 7 or higher: [+ [+ |
@go exchanger NPC: Illusion OS Cost: 50x |
|
Illusion Armor B-type [1] | MATK + 100. MATK + 10 per 2 refine rate. If refine rate is 7 or higher: [+ [+ |
@go exchanger NPC: Illusion OS Cost: 50x |

|
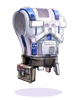
Illusion Engine Wing A-type [1] | MaxHP + 1000. MaxHP + 100 per 2 refine rate. If refine rate is 7 or higher: [+ [+ |
@go exchanger NPC: Illusion OS Cost: 50x |

|
Illusion Engine Wing B-type [1] | MaxHP + 1000. MaxHP + 100 per 2 refine rate. If refine rate is 7 or higher: [+ [+ |
@go exchanger NPC: Illusion OS Cost: 50x |

|
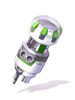
Illusion Leg A-type [1] | MaxSP + 200 MaxSP + 20 per 2 refine rate. If refine rate is 7 or higher: [+ [+ |
@go exchanger NPC: Illusion OS Cost: 50x |

|
Illusion Leg B-type [1] | MaxSP + 200 MaxSP + 20 per 2 refine rate. If refine rate is 7 or higher: [+ [+ |
@go exchanger NPC: Illusion OS Cost: 50x |
|
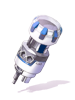
Illusion Booster R [1] | ATK + 5%.
|
@go exchanger NPC: Illusion OS Cost: 50x |
|
Illusion Booster L [1] | ATK + 5%.
|
@go exchanger NPC: Illusion OS Cost: 50x |
|
Illusion Battle chip R [1] | MATK + 5%.
|
@go exchanger NPC: Illusion OS Cost: 50x |
|
Illusion Battle chip L [1] | MATK + 5%.
|
@go exchanger NPC: Illusion OS Cost: 50x |
Illusion OS Modification Modules
Modification Modules can be crafted for ![]() Cor Core x5 and
Cor Core x5 and ![]() Unknown Parts x30 at the Illusion OS NPC in Fortessa 84/112 You can use @go exchanger to get to the NPC
Unknown Parts x30 at the Illusion OS NPC in Fortessa 84/112 You can use @go exchanger to get to the NPC
There are four different types of module ![]() Normal ,
Normal , ![]() Rare ,
Rare , ![]() Unique , and
Unique , and ![]() Legendary . Normal has the highest chance of success to craft and Legendary has the lowest.
Legendary . Normal has the highest chance of success to craft and Legendary has the lowest.
Illusion Equipment can be modified with a number of different module types. Each piece of equipment can have a maximum of 3 modules. Though certain modules have a restriction on the number of times it can be place on the equipment.
| Armor | ||
|---|---|---|
| Module | Effect | |
Up to 3 modules can be placed on equipment |
| |
Up to 3 modules can be placed on equipment |
| |
Up to 2 modules can be placed on equipment |
| |
Up to 2 modules can be placed on equipment |
| |
Up to 2 modules can be placed on equipment |
| |
Up to 1 modules can be placed on equipment |
| |
| Engine Wing | ||
|---|---|---|
| Module | Effect | |
Up to 3 modules can be placed on equipment |
| |
Up to 3 modules can be placed on equipment |
| |
Up to 2 modules can be placed on equipment |
| |
Up to 2 modules can be placed on equipment |
| |
Up to 2 modules can be placed on equipment |
| |
Up to 1 modules can be placed on equipment |
| |
| Leg | ||
|---|---|---|
| Module | Effect | |
Up to 3 modules can be placed on equipment |
| |
Up to 3 modules can be placed on equipment |
| |
Up to 2 modules can be placed on equipment |
| |
Up to 2 modules can be placed on equipment |
| |
Up to 2 modules can be placed on equipment |
| |
Up to 1 modules can be placed on equipment |
| |
Only 1 Legendary module per equipment |
| |
Only 1 Legendary module per equipment |
| |
Only 1 Legendary module per equipment |
| |
Only 1 Legendary module per equipment |
| |
Only 1 Legendary module per equipment |
| |
Only 1 Legendary module per equipment |
| |
| Booster R & Battle Chip R | ||
|---|---|---|
| Module | Effect | |
Up to 3 modules can be placed on equipment |
| |
Up to 3 modules can be placed on equipment |
| |
Up to 3 modules can be placed on equipment |
| |
Up to3 modules can be placed on equipment |
| |
Up to 2 modules can be placed on equipment |
| |
Up to 1 modules can be placed on equipment |
| |
Up to 1 modules can be placed on equipment |
| |
Up to 1 modules can be placed on equipment |
| |
Up to 1 modules can be placed on equipment |
| |
Up to 1 modules can be placed on equipment |
| |
Up to 1 modules can be placed on equipment |
| |
| Booster L & Battle Chip L | ||
|---|---|---|
| Module | Effect | |
Up to 3 modules can be placed on equipment |
| |
Up to 3 modules can be placed on equipment |
| |
Up to 3 modules can be placed on equipment |
| |
Up to 3 modules can be placed on equipment |
| |
Up to 2 modules can be placed on equipment |
| |
Up to 1 modules can be placed on equipment |
| |
Up to 1 modules can be placed on equipment |
| |
Up to 1 modules can be placed on equipment |
| |
Up to 1 modules can be placed on equipment |
| |
Up to 1 modules can be placed on equipment |
| |
Up to 1 modules can be placed on equipment |
| |