Difference between revisions of "OS Mission"
Hypermage2 (talk | contribs) (→Walkthrough: Added monsters and walkthrough) |
Hypermage2 (talk | contribs) |
||
| Line 58: | Line 58: | ||
=Equipment= | =Equipment= | ||
| + | {| class="mw-collapsible wikitable" style="text-align: center; margin:auto; width: 90%" | ||
| + | ! style="background-color:#B6D4D9; width: 10%" | Image | ||
| + | ! style="background-color:#B6D4D9;" | Name | ||
| + | ! style="background-color:#B6D4D9;" | Effect | ||
| + | ! style="background-color:#B6D4D9;" | How to obtain | ||
| + | |- | ||
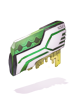
| + | {{EpisodeGear|id2=15376|name2=Illusion Armor A-type [1<nowiki>]</nowiki>|effect= | ||
| + | ATK + 100.<br> | ||
| + | ATK + 10 per 2 refine rate. | ||
| + | ----------------- | ||
| + | If refine rate is 7 or higher:<br> | ||
| + | Increases attack speed (reduces delay after attack by 10%).<br> | ||
| + | ------------------- | ||
| + | [+ {{Item List |id=20933|item=Illusion Engine Wing A-type [1<nowiki>]</nowiki>}}]<br> | ||
| + | ATK + 50. | ||
| + | ----------------- | ||
| + | [+ {{Item List |id=20934|item=Illusion Engine Wing B-type [1<nowiki>]</nowiki>}}]<br> | ||
| + | Reduces delay after skill by 10%.<br> | ||
| + | <br>Class: Armor<br> | ||
| + | Defense: 105<br> | ||
| + | Weight: 100<br> | ||
| + | Required Level: 130<br> | ||
| + | Usable Jobs: All<br> | ||
| + | |howto=[[Fortessa#Instance_Area_.28.40go_exchanger.29 | @go exchanger]]<br> NPC: Illusion OS<br> Cost: 50x {{Item List |id=25723 |item=Cor Core}}<br> }} | ||
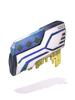
| + | {{EpisodeGear|id2=15377|name2=Illusion Armor B-type [1<nowiki>]</nowiki>|effect= | ||
| + | MATK + 100.<br> | ||
| + | MATK + 10 per 2 refine rate. | ||
| + | ---------------- | ||
| + | If refine rate is 7 or higher:<br> | ||
| + | Reduces variable casting time by 10%. | ||
| + | ------------------- | ||
| + | [+ {{Item List |id=20933|item=Illusion Engine Wing A-type}}] <br> | ||
| + | Increases attack speed (reduces delay after attack by 10%). | ||
| + | ---------------------- | ||
| + | [+ {{Item List |id=20934|item=Illusion Engine Wing B-type}}] <br> | ||
| + | MATK + 50.<br> | ||
| + | <br>Class: Armor<br> | ||
| + | Defense: 105<br> | ||
| + | Weight: 100<br> | ||
| + | Required Level: 130<br> | ||
| + | Usable Jobs: All<br> | ||
| + | |howto=[[Fortessa#Instance_Area_.28.40go_exchanger.29 | @go exchanger]]<br> NPC: Illusion OS<br> Cost: 50x {{Item List |id=25723 |item=Cor Core}}<br> }} | ||
| + | {{EpisodeGear|id2=20933|name2=Illusion Engine Wing A-type [1<nowiki>]</nowiki>|effect= | ||
| + | MaxHP + 1000.<br> | ||
| + | MaxHP + 100 per 2 refine rate. | ||
| + | -------------- | ||
| + | If refine rate is 7 or higher:<br> | ||
| + | Increases attack speed (reduces delay after attack by 5%). | ||
| + | --------------- | ||
| + | [+ {{Item List |id=22196|item=Illusion Leg A-type}}] <br> | ||
| + | Increases critical damage by 10%. | ||
| + | ----------------- | ||
| + | [+ {{Item List |id=22197|item=Illusion Leg B-type}}] <br> | ||
| + | Reduces variable casting time by 10%.<br> | ||
| + | <br>Class: Garment<br> | ||
| + | Defense: 50<br> | ||
| + | Weight: 90<br> | ||
| + | Required Level: 130<br> | ||
| + | Usable Jobs: All<br> | ||
| + | |howto=[[Fortessa#Instance_Area_.28.40go_exchanger.29 | @go exchanger]]<br> NPC: Illusion OS<br> Cost: 50x {{Item List |id=25723 |item=Cor Core}}<br> }} | ||
| + | {{EpisodeGear|id2=20934|name2=Illusion Engine Wing B-type [1<nowiki>]</nowiki>|effect= | ||
| + | MaxHP + 1000.<br> | ||
| + | MaxHP + 100 per 2 refine rate. | ||
| + | ----------------- | ||
| + | If refine rate is 7 or higher:<br> | ||
| + | Reduces variable casting time by 5%. | ||
| + | ---------------- | ||
| + | [+ {{Item List |id=22196|item=Illusion Leg A-type}}] <br> | ||
| + | Increases long ranged physical damage by 10%. | ||
| + | -------------- | ||
| + | [+ {{Item List |id=22197|item=Illusion Leg B-type}}] <br> | ||
| + | Increases all properties magic damage by 10%.<br> | ||
| + | <br>Class: Garment<br> | ||
| + | Defense: 50<br> | ||
| + | Weight: 90<br> | ||
| + | Required Level: 130<br> | ||
| + | Usable Jobs: All<br> | ||
| + | |howto=[[Fortessa#Instance_Area_.28.40go_exchanger.29 | @go exchanger]]<br> NPC: Illusion OS<br> Cost: 50x {{Item List |id=25723 |item=Cor Core}}<br> }} | ||
| + | {{EpisodeGear|id2=22196|name2=Illusion Leg A-type [1<nowiki>]</nowiki>|effect= | ||
| + | MaxSP + 200<br> | ||
| + | MaxSP + 20 per 2 refine rate. | ||
| + | ------------------- | ||
| + | If refine rate is 7 or higher:<br> | ||
| + | Increases long ranged physical damage by 5%. | ||
| + | ----------------- | ||
| + | [+ {{Item List |id=15376|item=Illusion Armor A-type}}] <br> | ||
| + | ATK + 5%. | ||
| + | ------------------- | ||
| + | [+ {{Item List |id=15377|item=Illusion Armor B-type}}] <br> | ||
| + | Increases attack speed (reduces delay after attack by 5%).<br> | ||
| + | <br>Class: Shoes<br> | ||
| + | Defense: 20<br> | ||
| + | Weight: 50<br> | ||
| + | Required Level: 130<br> | ||
| + | Usable Jobs: All<br> | ||
| + | |howto=[[Fortessa#Instance_Area_.28.40go_exchanger.29 | @go exchanger]]<br> NPC: Illusion OS<br> Cost: 50x {{Item List |id=25723 |item=Cor Core}}<br> }} | ||
| + | {{EpisodeGear|id2=22197|name2=Illusion Leg B-type [1<nowiki>]</nowiki>|effect= | ||
| + | MaxSP + 200<br> | ||
| + | MaxSP + 20 per 2 refine rate. | ||
| + | ------------------- | ||
| + | If refine rate is 7 or higher:<br> | ||
| + | Increases all properties magical damage by 5%. | ||
| + | ------------------ | ||
| + | [+ {{Item List |id=15376|item=Illusion Armor A-type}}] <br> | ||
| + | MaxSP + 5%.<br> | ||
| + | -------------------- | ||
| + | [+ {{Item List |id=15377|item=Illusion Armor B-type}}] <br> | ||
| + | MATK + 5%.<br> | ||
| + | <br>Class: Shoes<br> | ||
| + | Defense: 20<br> | ||
| + | Weight: 50<br> | ||
| + | Required Level: 130<br> | ||
| + | Usable Jobs: All<br> | ||
| + | |howto=[[Fortessa#Instance_Area_.28.40go_exchanger.29 | @go exchanger]]<br> NPC: Illusion OS<br> Cost: 50x {{Item List |id=25723 |item=Cor Core}}<br> }} | ||
| + | {{EpisodeGear|id2=32207|name2=Illusion Booster R [1<nowiki>]</nowiki>|effect= | ||
| + | ATK + 5%.<br> | ||
| + | <br>Class: Accessory (right)<br> | ||
| + | Defense: 0<br> | ||
| + | Weight: 10<br> | ||
| + | Required Level: 130<br> | ||
| + | Usable Jobs: All<br> | ||
| + | |howto=[[Fortessa#Instance_Area_.28.40go_exchanger.29 | @go exchanger]]<br> NPC: Illusion OS<br> Cost: 50x {{Item List |id=25723 |item=Cor Core}}<br> }} | ||
| + | {{EpisodeGear|id2=32208|name2=Illusion Booster L [1<nowiki>]</nowiki>|effect= | ||
| + | ATK + 5%.<br> | ||
| + | <br>Class: Accessory (left)<br> | ||
| + | Defense: 0<br> | ||
| + | Weight: 10<br> | ||
| + | Required Level: 130<br> | ||
| + | Usable Jobs: All<br> | ||
| + | |howto=[[Fortessa#Instance_Area_.28.40go_exchanger.29 | @go exchanger]]<br> NPC: Illusion OS<br> Cost: 50x {{Item List |id=25723 |item=Cor Core}}<br> }} | ||
| + | {{EpisodeGear|id2=32209|name2=Illusion Battle chip R [1<nowiki>]</nowiki>|effect= | ||
| + | MATK + 5%.<br> | ||
| + | <br>Class: Accessory (right)<br> | ||
| + | Defense: 0<br> | ||
| + | Weight: 10<br> | ||
| + | Required Level: 130<br> | ||
| + | Usable Jobs: All<br> | ||
| + | |howto=[[Fortessa#Instance_Area_.28.40go_exchanger.29 | @go exchanger]]<br> NPC: Illusion OS<br> Cost: 50x {{Item List |id=25723 |item=Cor Core}}<br> }} | ||
| + | {{EpisodeGear|id2=32210|name2=Illusion Battle chip L [1<nowiki>]</nowiki>|effect= | ||
| + | MATK + 5%.<br> | ||
| + | <br>Class: Accessory (left)<br> | ||
| + | Defense: 0<br> | ||
| + | Weight: 10<br> | ||
| + | Required Level: 130<br> | ||
| + | Usable Jobs: All<br> | ||
| + | |howto=[[Fortessa#Instance_Area_.28.40go_exchanger.29 | @go exchanger]]<br> NPC: Illusion OS<br> Cost: 50x {{Item List |id=25723 |item=Cor Core}}<br> }} | ||
| + | |} | ||
| + | <br> | ||
| + | |||
| + | ==== Illusion OS Modification Modules ==== | ||
| + | Modification Modules can be crafted for {{Item List |id=25723|item=Cor Core}} x5 and {{Item List |id=25669|item=Unknown Parts}} x30 at the Illusion OS NPC in Fortessa 84/112 You can use [[Fortessa#Instance_Area_.28.40go_exchanger.29 | @go exchanger]] to get to the NPC | ||
| + | |||
| + | There are four different types of module {{Item List |id=25674|item=Normal}}, {{Item List |id=25687|item=Rare}}, {{Item List |id=25693|item=Unique}}, and {{Item List |id=25700|item=Legendary}}. Normal has the highest chance of success to craft and Legendary has the lowest. | ||
| + | |||
| + | Illusion Equipment can be modified with a number of different module types. | ||
| + | Each piece of equipment can have a maximum of 3 modules. | ||
| + | Though certain modules have a restriction on the number of times it can be place on the equipment. | ||
| + | |||
| + | |||
| + | {| class="mw-collapsible mw-collapsed wikitable" style="text-align: left; margin:auto; width: 85%" | ||
| + | !colspan=3| Armor | ||
| + | |- | ||
| + | !Module | ||
| + | !Effect | ||
| + | |- | ||
| + | |- | ||
| + | ||{{Item List |id=25670|item=Defense}} | ||
| + | <font color=blue> Up to 3 modules can be placed on equipment </font> | ||
| + | | | ||
| + | *Def + 25 | ||
| + | *If refine rate is 7 or higher:<br> Def + 10 | ||
| + | *If refine rate is 9 or higher:<br> Def + 10 | ||
| + | |- | ||
| + | ||{{Item List |id=25671|item=Magic Defense}} | ||
| + | <font color=blue> Up to 3 modules can be placed on equipment </font> | ||
| + | | | ||
| + | *Mdef + 2 | ||
| + | *If refine rate is 7 or higher:<br> Mdef + 3 | ||
| + | *If refine rate is 9 or higher:<br> Mdef + 3 | ||
| + | |- | ||
| + | ||{{Item List |id=25687|item=Power}} | ||
| + | <font color=blue> Up to 2 modules can be placed on equipment </font> | ||
| + | | | ||
| + | *ATK + 5%. | ||
| + | *If refine rate is 7 or higher:<br> ATK + 25. | ||
| + | *If refine rate is 9 or higher:<br> additional ATK + 25. | ||
| + | |- | ||
| + | ||{{Item List |id=25688|item=Magic}} | ||
| + | <font color=blue> Up to 2 modules can be placed on equipment </font> | ||
| + | | | ||
| + | *MATK + 5%. | ||
| + | *If refine rate is 7 or higher:<br> MATK + 25. | ||
| + | *If refine rate is 9 or higher:<br> additional MATK + 25. | ||
| + | |- | ||
| + | ||{{Item List |id=25689|item=Shooter}} | ||
| + | <font color=blue> Up to 2 modules can be placed on equipment </font> | ||
| + | | | ||
| + | *Increases long ranged physical damage by 3%. | ||
| + | *If refine rate is 7 or higher:<br> increases long ranged physical damage by additional 2%. | ||
| + | *If refine rate is 9 or higher:<br> increases long ranged physical damage by additional 2%. | ||
| + | |- | ||
| + | ||{{Item List |id=25693|item=Delay After Skill}} | ||
| + | <font color=blue> Up to 1 modules can be placed on equipment </font> | ||
| + | | | ||
| + | *Reduces delay after skill by 5%. | ||
| + | *If refine rate is 7 or higher:<br> reduces delay after skill by an additional 5%. | ||
| + | *If refine rate is 9 or higher:<br> reduces delay after skill by an additional 5%. | ||
| + | |} | ||
| + | |||
| + | {| class="mw-collapsible mw-collapsed wikitable" style="text-align: left; margin:auto; width: 85%" | ||
| + | !colspan=3| Engine Wing | ||
| + | |- | ||
| + | !Module | ||
| + | !Effect | ||
| + | |- | ||
| + | |- | ||
| + | ||{{Item List |id=25670|item=Defense}} | ||
| + | <font color=blue> Up to 3 modules can be placed on equipment </font> | ||
| + | | | ||
| + | *Def + 25 | ||
| + | *If refine rate is 7 or higher:<br> Def + 10 | ||
| + | *If refine rate is 9 or higher:<br> Def + 10 | ||
| + | |- | ||
| + | ||{{Item List |id=25671|item=Magic Defense}} | ||
| + | <font color=blue> Up to 3 modules can be placed on equipment </font> | ||
| + | | | ||
| + | *Mdef + 2 | ||
| + | *If refine rate is 7 or higher:<br> Mdef + 3 | ||
| + | *If refine rate is 9 or higher:<br> Mdef + 3 | ||
| + | |- | ||
| + | ||{{Item List |id=25690|item=Fast}} | ||
| + | <font color=blue> Up to 2 modules can be placed on equipment </font> | ||
| + | | | ||
| + | *ASPD + 1. | ||
| + | *If refine rate is 7 or higher:<br> increases attack speed (reduces delay after attack by 3%). | ||
| + | *If refine rate is 9 or higher:<br> increases attack speed (reduces delay after attack by additional 3%). | ||
| + | |- | ||
| + | ||{{Item List |id=25691|item=Caster}} | ||
| + | <font color=blue> Up to 2 modules can be placed on equipment </font> | ||
| + | | | ||
| + | *Reduces variable casting time by 5%. | ||
| + | *If refine rate is 7 or higher:<br> reduces variable casting time by an additional 3%. | ||
| + | *If refine rate is 9 or higher:<br> reduces variable casting time by an additional 3%. | ||
| + | |- | ||
| + | ||{{Item List |id=25692|item=Critical}} | ||
| + | <font color=blue> Up to 2 modules can be placed on equipment </font> | ||
| + | | | ||
| + | *Critical Rate + 10. | ||
| + | *If refine rate is 7 or higher:<br> increases critical damage by 5%. | ||
| + | *If refine rate is 9 or higher:<br> increases critical damage by an additional 5%. | ||
| + | |- | ||
| + | ||{{Item List |id=25695|item=Above All}} | ||
| + | <font color=blue> Up to 1 modules can be placed on equipment </font> | ||
| + | | | ||
| + | *Reduces physical and magical damage taken from all property enemies by 5%. | ||
| + | *If refine rate is 7 or higher:<br> reduces physical and magical damage taken from all size enemies by 5%. | ||
| + | *If refine rate is 9 or higher:<br> reduces physical and magical damage taken from all race enemies by 5% (excludes player). | ||
| + | |} | ||
| + | |||
| + | {| class="mw-collapsible mw-collapsed wikitable" style="text-align: left; margin:auto; width: 85%" | ||
| + | !colspan=3| Leg | ||
| + | |- | ||
| + | !Module | ||
| + | !Effect | ||
| + | |- | ||
| + | |- | ||
| + | ||{{Item List |id=25670|item=Defense}} | ||
| + | <font color=blue> Up to 3 modules can be placed on equipment </font> | ||
| + | | | ||
| + | *Def + 25 | ||
| + | *If refine rate is 7 or higher:<br> Def + 10 | ||
| + | *If refine rate is 9 or higher:<br> Def + 10 | ||
| + | |- | ||
| + | ||{{Item List |id=25671|item=Magic Defense}} | ||
| + | <font color=blue> Up to 3 modules can be placed on equipment </font> | ||
| + | | | ||
| + | *Mdef + 2 | ||
| + | *If refine rate is 7 or higher:<br> Mdef + 3 | ||
| + | *If refine rate is 9 or higher:<br> Mdef + 3 | ||
| + | |- | ||
| + | ||{{Item List |id=25684|item=Vital}} | ||
| + | <font color=blue> Up to 2 modules can be placed on equipment </font> | ||
| + | | | ||
| + | *MaxHP + 5%. | ||
| + | *If refine rate is 7 or higher:<br> MaxHP + 500 | ||
| + | *If refine rate is 9 or higher:<br> additional MaxHP + 750 | ||
| + | |- | ||
| + | ||{{Item List |id=25685|item=Mental}} | ||
| + | <font color=blue> Up to 2 modules can be placed on equipment </font> | ||
| + | | | ||
| + | *MaxSP + 5%. | ||
| + | *If refine rate is 7 or higher:<br> MaxSP + 100 | ||
| + | *If refine rate is 9 or higher:<br> additional MaxSP + 150 | ||
| + | |- | ||
| + | ||{{Item List |id=25686|item=Heal}} | ||
| + | <font color=blue> Up to 2 modules can be placed on equipment </font> | ||
| + | | | ||
| + | *Increases heal effectiveness by 5%. | ||
| + | *If refine rate is 7 or higher:<br> increases heal effectiveness by additional 5%. | ||
| + | *If refine rate is 9 or higher:<br> increases heal effectiveness by additional 5%. | ||
| + | |- | ||
| + | ||{{Item List |id=25694|item=Fixed Casting}} | ||
| + | <font color=blue> Up to 1 modules can be placed on equipment </font> | ||
| + | | | ||
| + | *Reduces fixed casting time by 0.3 second. | ||
| + | *If refine rate is 7 or higher:<br> reduces fixed casting time by additional 0.2 second. | ||
| + | *If refine rate is 9 or higher:<br> reduces fixed casting time by additional 0.2 second. | ||
| + | |- | ||
| + | ||{{Item List |id=25700|item=Unlimited Vital}} | ||
| + | <font color=blue> Only 1 Legendary module per equipment</font> | ||
| + | | | ||
| + | *Has a chance to gain "Everlasting Life" for 10 seconds when receiving physical or magical damage. | ||
| + | *<font color=red> Everlasting Life </font> | ||
| + | *Vit + 50, recover 400 HP per 0.5 second, drains 20 SP per second for 10 seconds. | ||
| + | |- | ||
| + | ||{{Item List |id=25701|item=Spell Buster}} | ||
| + | <font color=blue> Only 1 Legendary module per equipment</font> | ||
| + | | | ||
| + | *Has a chance to gain "Magic Storm" for 10 seconds when dealing magical damage. | ||
| + | *<font color=red> Magic Storm </font> | ||
| + | *Int + 50, MATK + 15%, ATK - 15% for 10 seconds. | ||
| + | |- | ||
| + | ||{{Item List |id=25702|item=Firing Shot}} | ||
| + | <font color=blue> Only 1 Legendary module per equipment</font> | ||
| + | | | ||
| + | *Has a chance to gain "Plunging Shooter" for 10 seconds when dealing physical damage. | ||
| + | *<font color=red> Plunging Shooter </font> | ||
| + | *Dex + 50, increases long ranged physical damage by 10%, drains 20 SP per second for 10 seconds. | ||
| + | |- | ||
| + | ||{{Item List |id=25703|item=Overpower}} | ||
| + | <font color=blue> Only 1 Legendary module per equipment</font> | ||
| + | | | ||
| + | *Has a chance to gain "Raging Fight" for 10 seconds when dealing physical damage. | ||
| + | *<font color=red> Raging Fight </font> | ||
| + | *Str + 50, ATK + 15%, MATK - 15% for 10 seconds. | ||
| + | |- | ||
| + | ||{{Item List |id=25704|item=Fatal Flash}} | ||
| + | <font color=blue> Only 1 Legendary module per equipment</font> | ||
| + | | | ||
| + | *Has a chance to gain "Deadly Lightspeed" for 10 seconds when dealing physical damage. | ||
| + | *<font color=red> Deadly Lightspeed </font> | ||
| + | *Agi + 50, increases critical damage by 10%, drains 300 HP per second for 10 seconds. | ||
| + | |- | ||
| + | ||{{Item List |id=25705|item=Lucky Strike}} | ||
| + | <font color=blue> Only 1 Legendary module per equipment</font> | ||
| + | | | ||
| + | *Has a chance to gain "Good Fortune" for 10 seconds when dealing magical damage. | ||
| + | * <font color=red> Good Fortune </font> | ||
| + | *When it procs, Luk + 50, increases all property magical damage by 10%, drains 300 HP per second for 10 seconds. | ||
| + | |} | ||
| + | |||
| + | {| class="mw-collapsible mw-collapsed wikitable" style="text-align: left; margin:auto; width: 85%" | ||
| + | !colspan=3| Booster R & Battle Chip R | ||
| + | |- | ||
| + | !Module | ||
| + | !Effect | ||
| + | |- | ||
| + | |- | ||
| + | ||{{Item List |id=25672|item=Vit}} | ||
| + | <font color=blue> Up to 3 modules can be placed on equipment </font> | ||
| + | | | ||
| + | *Vit +3 | ||
| + | |- | ||
| + | ||{{Item List |id=25673|item=Luk}} | ||
| + | <font color=blue> Up to 3 modules can be placed on equipment </font> | ||
| + | | | ||
| + | *Luk +3 | ||
| + | |- | ||
| + | ||{{Item List |id=25674|item=Str}} | ||
| + | <font color=blue> Up to 3 modules can be placed on equipment </font> | ||
| + | | | ||
| + | *Str +3 | ||
| + | |- | ||
| + | ||{{Item List |id=25675|item=Agi}} | ||
| + | <font color=blue> Up to3 modules can be placed on equipment </font> | ||
| + | | | ||
| + | *Agi +3 | ||
| + | |- | ||
| + | ||{{Item List |id=25678|item=HP Recovery}} | ||
| + | <font color=blue> Up to 2 modules can be placed on equipment </font> | ||
| + | | | ||
| + | *HP Recovery +20% | ||
| + | |- | ||
| + | ||{{Item List |id=25680|item=Spell}} | ||
| + | <font color=blue> Up to 1 modules can be placed on equipment </font> | ||
| + | | | ||
| + | *MATK +18 | ||
| + | * Reduce Variable Cast Time by 10% | ||
| + | |- | ||
| + | ||{{Item List |id=25681|item=Attack Speed}} | ||
| + | <font color=blue> Up to 1 modules can be placed on equipment </font> | ||
| + | | | ||
| + | *Increase attack speed (reduce delay after attack) by 10% | ||
| + | |- | ||
| + | ||{{Item List |id=25682|item=Fatal}} | ||
| + | <font color=blue> Up to 1 modules can be placed on equipment </font> | ||
| + | | | ||
| + | *Critical Rate +4 | ||
| + | *Increase critical damage by 10% | ||
| + | |- | ||
| + | ||{{Item List |id=25683|item=Expert Archer}} | ||
| + | <font color=blue> Up to 1 modules can be placed on equipment </font> | ||
| + | | | ||
| + | *Increase Long Range Physical damage by 10% | ||
| + | |- | ||
| + | ||{{Item List |id=25696|item=Drain Life}} | ||
| + | <font color=blue> Up to 1 modules can be placed on equipment </font> | ||
| + | | | ||
| + | *Has a 2% chance to restore 2% of damage as HP when dealing physical damage | ||
| + | |- | ||
| + | ||{{Item List |id=25698|item=Magic Healing}} | ||
| + | <font color=blue> Up to 1 modules can be placed on equipment </font> | ||
| + | | | ||
| + | *Has a 2% chance to recover 400 HP per 0.5 second for 10 seconds when dealing magical damage | ||
| + | |} | ||
| + | |||
| + | {| class="mw-collapsible mw-collapsed wikitable" style="text-align: left; margin:auto; width: 85%" | ||
| + | |- | ||
| + | !colspan=3| Booster L & Battle Chip L | ||
| + | |- | ||
| + | !Module | ||
| + | !Effect | ||
| + | |- | ||
| + | |- | ||
| + | ||{{Item List |id=25672|item=Vit}} | ||
| + | <font color=blue> Up to 3 modules can be placed on equipment </font> | ||
| + | | | ||
| + | *VIT +3 | ||
| + | |- | ||
| + | ||{{Item List |id=25673|item=LUK}} | ||
| + | <font color=blue> Up to 3 modules can be placed on equipment </font> | ||
| + | | | ||
| + | *LUK +3 | ||
| + | |- | ||
| + | ||{{Item List |id=25676|item=INT}} | ||
| + | <font color=blue> Up to 3 modules can be placed on equipment </font> | ||
| + | | | ||
| + | *INT +3 | ||
| + | |- | ||
| + | ||{{Item List |id=25677|item=Dex}} | ||
| + | <font color=blue> Up to 3 modules can be placed on equipment </font> | ||
| + | | | ||
| + | *DEX +3 | ||
| + | |- | ||
| + | ||{{Item List |id=25679|item=SP Recovery}} | ||
| + | <font color=blue> Up to 2 modules can be placed on equipment </font> | ||
| + | | | ||
| + | *SP recovery +20% | ||
| + | |- | ||
| + | ||{{Item List |id=25680|item=Spell}} | ||
| + | <font color=blue> Up to 1 modules can be placed on equipment </font> | ||
| + | | | ||
| + | *MATK +18 | ||
| + | * Reduce Variable Cast Time by 10% | ||
| + | |- | ||
| + | ||{{Item List |id=25681|item=Attack Speed}} | ||
| + | <font color=blue> Up to 1 modules can be placed on equipment </font> | ||
| + | | | ||
| + | *Increase attack speed (reduce delay after attack) by 10% | ||
| + | |- | ||
| + | ||{{Item List |id=25682|item=Fatal}} | ||
| + | <font color=blue> Up to 1 modules can be placed on equipment </font> | ||
| + | | | ||
| + | *Critical Rate +4 | ||
| + | *Increase critical damage by 10% | ||
| + | |- | ||
| + | ||{{Item List |id=25683|item=Expert Archer}} | ||
| + | <font color=blue> Up to 1 modules can be placed on equipment </font> | ||
| + | | | ||
| + | *Increase Long Range Physical damage by 10% | ||
| + | |- | ||
| + | ||{{Item List |id=25697|item=Drain Soul}} | ||
| + | <font color=blue> Up to 1 modules can be placed on equipment </font> | ||
| + | | | ||
| + | *Has a 1% chance to restore 1% of damage as SP when dealing physical damage | ||
| + | |- | ||
| + | ||{{Item List |id=25699|item=Magic Soul}} | ||
| + | <font color=blue> Up to 1 modules can be placed on equipment </font> | ||
| + | | | ||
| + | *Has a 1% chance to recovery 80 SP per 0.5 second for 10 seconds when dealing magical damage | ||
| + | |} | ||
Revision as of 01:31, 10 May 2022
| Requirements | |
|---|---|
| Base Level: | 110 |
| Starting Point: | Instance Manager in any town
|
| Rewards | |
| Experience: | - |
| Cooldown | |
| Cooldown: | Resets at 00:01 Servertime |
Walkthrough
The objective is to clear waves of mobs to progress in the instance. The waves get progressively stronger, starting at CP 1 and ending in CP 6. At the end of the instance, you will have to fight Miguel who will be assigned a random CP, and has access to the following skills:
- Heal - When idle. Targets self. Heals for 9,999
- High Heal - When idle. Targets self. Long cast time.
- Bomb - When attacking and chasing.
- Earthquake - When attacking (CP5 4k per hit, CP7 about 10k damage per hit, CP20 about 40k damage per hit, CP22 43k per hit)
- Magnum Break - When attacking
- Ignition Break - When attacking
Miguel will also spawn fireballs around him that damage players that get too close to it. As the fight progresses, he will summon more fireballs around him.
Note: Despite the map showing a large area, the instance is actually confined to a small area of the map.


Enemies
| Image | Name | Level | HP | Size/Race/Element |
|---|---|---|---|---|

|
Incomplete Caput | 110 | 31,000 | Medium/Demi-Human/Dark 2 |

|
Incomplete Dolor | 111 | 31,000 | /Demi-Human/Poison 3 |

|
Incomplete Bellare | 112 | 38,000 | /Demi-Human/Neutral 2 |

|
Miguel | 115 | 8,600,000 | /Demi-Human/Wind 4 |
Equipment
| Image | Name | Effect | How to obtain |
|---|---|---|---|
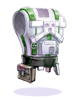
|
Illusion Armor A-type [1] | ATK + 100. ATK + 10 per 2 refine rate. If refine rate is 7 or higher: [+ [+ |
@go exchanger NPC: Illusion OS Cost: 50x |
|
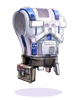
Illusion Armor B-type [1] | MATK + 100. MATK + 10 per 2 refine rate. If refine rate is 7 or higher: [+ [+ |
@go exchanger NPC: Illusion OS Cost: 50x |

|
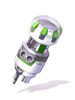
Illusion Engine Wing A-type [1] | MaxHP + 1000. MaxHP + 100 per 2 refine rate. If refine rate is 7 or higher: [+ [+ |
@go exchanger NPC: Illusion OS Cost: 50x |

|
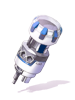
Illusion Engine Wing B-type [1] | MaxHP + 1000. MaxHP + 100 per 2 refine rate. If refine rate is 7 or higher: [+ [+ |
@go exchanger NPC: Illusion OS Cost: 50x |

|
Illusion Leg A-type [1] | MaxSP + 200 MaxSP + 20 per 2 refine rate. If refine rate is 7 or higher: [+ [+ |
@go exchanger NPC: Illusion OS Cost: 50x |

|
Illusion Leg B-type [1] | MaxSP + 200 MaxSP + 20 per 2 refine rate. If refine rate is 7 or higher: [+ [+ |
@go exchanger NPC: Illusion OS Cost: 50x |
|
Illusion Booster R [1] | ATK + 5%.
|
@go exchanger NPC: Illusion OS Cost: 50x |
|
Illusion Booster L [1] | ATK + 5%.
|
@go exchanger NPC: Illusion OS Cost: 50x |
|
Illusion Battle chip R [1] | MATK + 5%.
|
@go exchanger NPC: Illusion OS Cost: 50x |
|
Illusion Battle chip L [1] | MATK + 5%.
|
@go exchanger NPC: Illusion OS Cost: 50x |
Illusion OS Modification Modules
Modification Modules can be crafted for ![]() Cor Core x5 and
Cor Core x5 and ![]() Unknown Parts x30 at the Illusion OS NPC in Fortessa 84/112 You can use @go exchanger to get to the NPC
Unknown Parts x30 at the Illusion OS NPC in Fortessa 84/112 You can use @go exchanger to get to the NPC
There are four different types of module ![]() Normal ,
Normal , ![]() Rare ,
Rare , ![]() Unique , and
Unique , and ![]() Legendary . Normal has the highest chance of success to craft and Legendary has the lowest.
Legendary . Normal has the highest chance of success to craft and Legendary has the lowest.
Illusion Equipment can be modified with a number of different module types. Each piece of equipment can have a maximum of 3 modules. Though certain modules have a restriction on the number of times it can be place on the equipment.
| Armor | ||
|---|---|---|
| Module | Effect | |
Up to 3 modules can be placed on equipment |
| |
Up to 3 modules can be placed on equipment |
| |
Up to 2 modules can be placed on equipment |
| |
Up to 2 modules can be placed on equipment |
| |
Up to 2 modules can be placed on equipment |
| |
Up to 1 modules can be placed on equipment |
| |
| Engine Wing | ||
|---|---|---|
| Module | Effect | |
Up to 3 modules can be placed on equipment |
| |
Up to 3 modules can be placed on equipment |
| |
Up to 2 modules can be placed on equipment |
| |
Up to 2 modules can be placed on equipment |
| |
Up to 2 modules can be placed on equipment |
| |
Up to 1 modules can be placed on equipment |
| |
| Leg | ||
|---|---|---|
| Module | Effect | |
Up to 3 modules can be placed on equipment |
| |
Up to 3 modules can be placed on equipment |
| |
Up to 2 modules can be placed on equipment |
| |
Up to 2 modules can be placed on equipment |
| |
Up to 2 modules can be placed on equipment |
| |
Up to 1 modules can be placed on equipment |
| |
Only 1 Legendary module per equipment |
| |
Only 1 Legendary module per equipment |
| |
Only 1 Legendary module per equipment |
| |
Only 1 Legendary module per equipment |
| |
Only 1 Legendary module per equipment |
| |
Only 1 Legendary module per equipment |
| |
| Booster R & Battle Chip R | ||
|---|---|---|
| Module | Effect | |
Up to 3 modules can be placed on equipment |
| |
Up to 3 modules can be placed on equipment |
| |
Up to 3 modules can be placed on equipment |
| |
Up to3 modules can be placed on equipment |
| |
Up to 2 modules can be placed on equipment |
| |
Up to 1 modules can be placed on equipment |
| |
Up to 1 modules can be placed on equipment |
| |
Up to 1 modules can be placed on equipment |
| |
Up to 1 modules can be placed on equipment |
| |
Up to 1 modules can be placed on equipment |
| |
Up to 1 modules can be placed on equipment |
| |
| Booster L & Battle Chip L | ||
|---|---|---|
| Module | Effect | |
Up to 3 modules can be placed on equipment |
| |
Up to 3 modules can be placed on equipment |
| |
Up to 3 modules can be placed on equipment |
| |
Up to 3 modules can be placed on equipment |
| |
Up to 2 modules can be placed on equipment |
| |
Up to 1 modules can be placed on equipment |
| |
Up to 1 modules can be placed on equipment |
| |
Up to 1 modules can be placed on equipment |
| |
Up to 1 modules can be placed on equipment |
| |
Up to 1 modules can be placed on equipment |
| |
Up to 1 modules can be placed on equipment |
| |